Composting is a natural process of recycling organic matter, such as leaves, vegetable scraps, and other garden waste, into a valuable soil amendment known as compost. This process enriches the soil, helps retain moisture, suppresses plant diseases, and reduces the need for chemical fertilizers. Composting plays a crucial role in waste reduction and environmental sustainability, transforming what would otherwise be discarded into something beneficial for the garden and the planet. There are many types of composting methods and which is one is suitable for you depends on your own specific circumstances.
The purpose of this article is to explore different types of composting methods that can be used in households. From traditional composting to modern techniques like vermicomposting and Bokashi, understanding these methods will help you choose the best one for your needs and circumstances.
I still remember the day I discovered the different composting techniques. It was at a local gardening workshop in Gurgaon where I first heard about vermicomposting and Bokashi. Fascinated by the diversity of methods, I began experimenting with them in my own garden. This journey not only enhanced my gardening practices but also deepened my commitment to sustainable living. Now, I’m excited to share these insights with you.
Key Takeaways
- Composting converts organic waste into nutrient-rich soil.
- Traditional composting involves green and brown materials, layering, and turning.
- Vermicomposting uses worms to break down organic waste quickly.
- Bokashi composting ferments all kitchen scraps, including meat and dairy.
- Trench composting involves burying waste directly in the ground.
- Tumbler composting is efficient and space-saving.
- Leaf mold composting creates rich soil from fallen leaves.
- Hot composting requires high temperatures and regular turning.
- Cold composting is low-maintenance but slow.
- Indoor composting methods include small bins, vermicomposting, and Bokashi.
- Hugelkultur uses logs and organic waste to create raised beds.
- Choose a composting method based on space, time, effort, and materials.
Traditional Composting
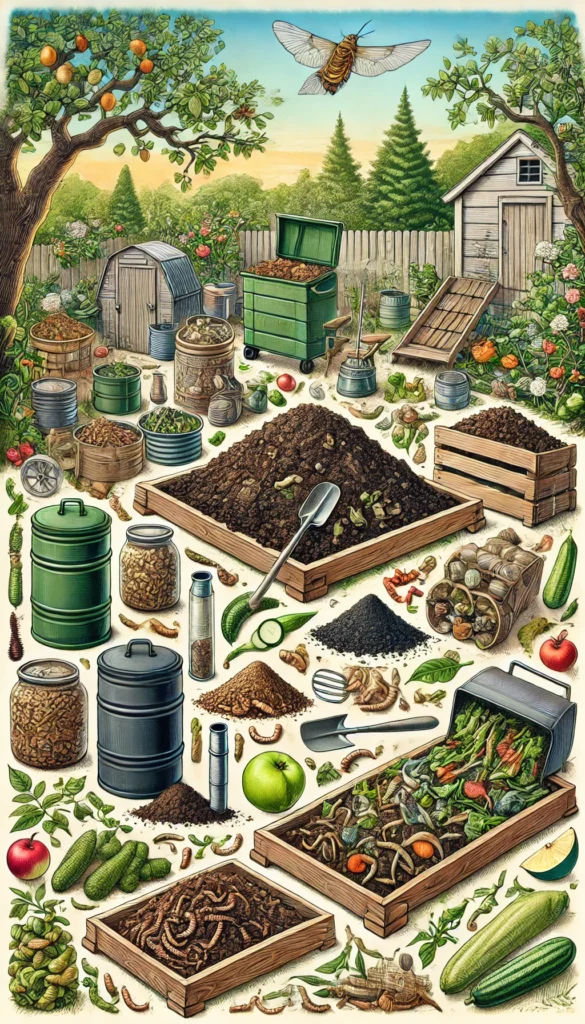
Traditional composting is one of the most common types of composting methods, involving a balance of green and brown materials. It involves the natural decomposition of organic materials in a pile or bin, creating compost over time. The process is aerobic, meaning it relies on oxygen and the activity of microorganisms to break down the materials.
Materials Needed (Green and Brown Materials)
To start traditional composting, you need two main types of materials:
- Green Materials: These are nitrogen-rich and include vegetable scraps, fruit peels, coffee grounds, and grass clippings.
- Brown Materials: These are carbon-rich and include dried leaves, straw, cardboard, and newspaper.
Process: Layering, Turning, and Maintaining
- Layering: Begin by creating layers of green and brown materials. A good rule of thumb is to aim for a ratio of about three parts brown to one part green.
- Turning: Regularly turning the compost pile helps introduce oxygen, which is essential for the decomposition process. Turn the pile every week or two.
- Maintaining: Keep the compost pile moist but not waterlogged. It should feel like a damp sponge. If it becomes too dry, add water or more green materials. If it’s too wet, add more brown materials.
Pros and Cons
Pros:
- Cost-Effective: Uses readily available materials.
- Nutrient-Rich Compost: Produces high-quality compost that enriches the soil.
- Reduces Waste: Diverts organic waste from landfills.
Cons:
- Space Requirements: Needs a designated area in the garden.
- Time-Consuming: Can take several months to a year to produce compost.
- Labor-Intensive: Requires regular turning and monitoring.
From my own experience, here are some tips for successful traditional composting:
- Balance Materials: Ensure a good mix of green and brown materials to avoid a smelly or slow compost pile.
- Chop Materials: Cutting or shredding larger pieces speeds up the decomposition process.
- Cover the Pile: Use a tarp or cover to retain moisture and heat, and to keep pests out.
- Be Patient: Composting is a slow process, but the results are worth the wait.
Vermicomposting
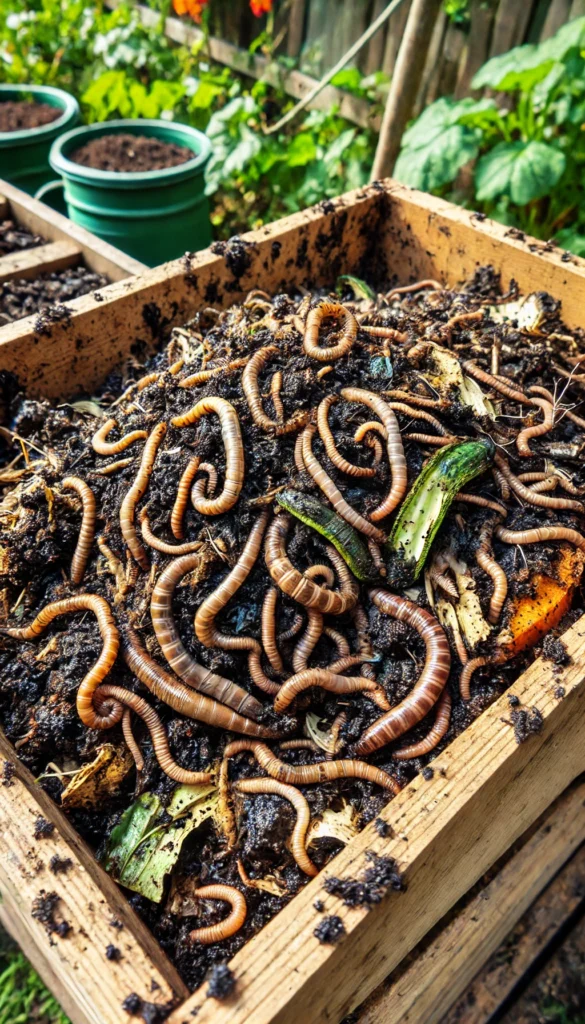
Vermicomposting is one of the methods of composting amongst the different types, that uses worms, specifically red wigglers, to break down organic waste into nutrient-rich compost. This method is ideal for households with limited space and produces high-quality compost quickly.
Benefits of Using Worms for Composting
Worms are incredibly efficient decomposers. They consume organic waste and excrete worm castings, which are rich in nutrients and beneficial microorganisms. Vermicomposting:
- Produces Rich Compost: Worm castings are an excellent soil amendment.
- Reduces Waste: Efficiently processes kitchen scraps.
- Compact: Suitable for small spaces, including indoors.
Materials and Setup (Bedding, Worms, Organic Waste)
To start vermicomposting, you’ll need:
- Bedding: Shredded newspaper, coconut coir, or cardboard. This provides a habitat for the worms.
- Worms: Red wigglers are the best choice due to their rapid reproduction and voracious appetite.
- Organic Waste: Vegetable scraps, fruit peels, coffee grounds, and eggshells. Avoid meat, dairy, and oily foods.
Setup:
- Prepare the Bin: Use a bin with ventilation holes. Add moist bedding material to the bottom.
- Add Worms: Introduce the red wigglers to the bin.
- Feed the Worms: Add organic waste, burying it slightly under the bedding.
- Maintain Moisture: Keep the bedding moist but not waterlogged.
Pls check out our Step by Step guide for Vermicomposting. It is a complete beginner friendly system.
Harvesting Worms
- Feeding: Add small amounts of organic waste regularly. Avoid overfeeding, which can lead to odors.
- Moisture: Maintain the right moisture level. If the bedding dries out, sprinkle water. If it’s too wet, add dry bedding.
- Harvesting: After a few months, the bin will contain worm castings. Push the castings to one side and add fresh bedding and food to the other side. The worms will migrate, allowing you to collect the castings.
Pros and Cons
Pros:
- Quick Composting: Produces compost faster than traditional methods.
- Space-Efficient: Suitable for indoor use and small spaces.
- High-Quality Compost: Worm castings are exceptionally rich in nutrients.
Cons:
- Maintenance: Requires regular monitoring and feeding.
- Temperature Sensitivity: Worms need a stable temperature range (15-25°C).
- Limited Waste Capacity: Best for small amounts of kitchen waste.
I started vermicomposting in my apartment and was amazed at how quickly the worms processed kitchen scraps. The castings made my potted plants flourish, showing a visible difference in their growth and health. Vermicomposting has been a rewarding and efficient method for me, and I highly recommend it for those with limited space or a desire to compost indoors.
Bokashi Composting
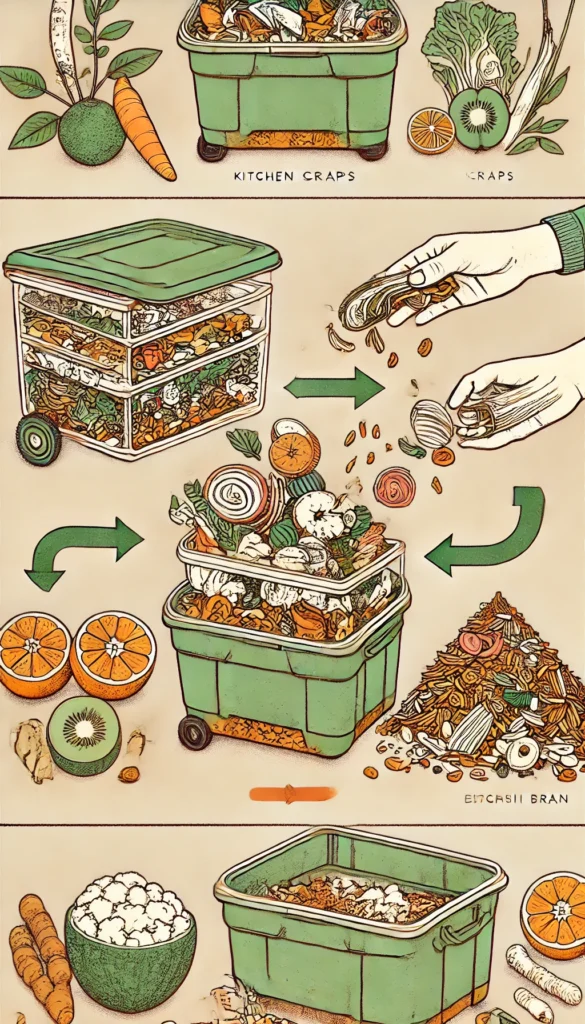
Bokashi composting is an anaerobic fermentation process that breaks down organic waste using a special inoculated bran. This method is unique because it can handle all kitchen scraps, including meat, dairy, and oily foods, which are typically excluded from other composting methods. The result is a fermented mixture that can be buried in the soil or added to a traditional compost pile for further decomposition.
Here is my detailed guide on how to setup a Bokashi COmposting System, perfect for beginners.
Materials Needed (Bokashi Bin, Bokashi Bran)
To get started with Bokashi composting, you need the following materials:
- Bokashi Bin: A specially designed, airtight bin with a drainage spout.You can buy a decent one from Amazon.
- Bokashi Bran: Bran inoculated with beneficial microorganisms (lactic acid bacteria, yeasts, and fungi) that facilitate the fermentation process.
Process: Adding Waste, Fermenting, and Burying
- Adding Waste: Place kitchen scraps into the Bokashi bin. Each time you add waste, sprinkle a layer of Bokashi bran over it. Press down to remove air pockets and seal the bin tightly.
- Fermenting: Allow the waste to ferment for about two weeks. During this time, the microorganisms break down the waste anaerobically, producing a fermented mixture.
- Burying: Once fermentation is complete, bury the fermented waste in the soil or add it to a traditional compost pile. It will decompose further and enrich the soil.
Pros and Cons
Pros:
- Versatility: Can compost all kitchen scraps, including meat and dairy.
- Odor-Free: The airtight bin and fermentation process minimize odors.
- Compact: Suitable for indoor use and small spaces.
Cons:
- Additional Step: Requires burying or further composting after fermentation.
- Cost: Initial investment in the Bokashi bin and bran.
For those with limited space, vermicomposting and Bokashi are excellent types of composting methods that can be done indoors.
I first tried Bokashi composting when I wanted to compost meat and dairy scraps from my kitchen. The process was surprisingly easy, and I appreciated the lack of odors. After fermenting, I buried the waste in my garden, and within a few weeks, it had broken down completely, enriching the soil. Bokashi composting has become a valuable addition to my composting practices, allowing me to handle a wider range of kitchen waste.
How to Start an Organic Kitchen Garden
Trench or Pit Composting
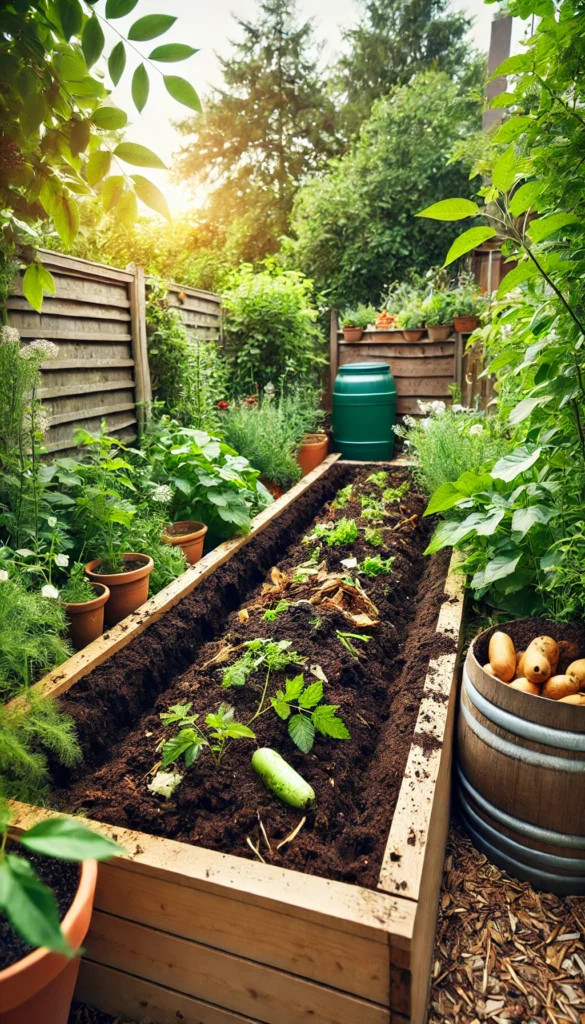
Trench or pit composting is a simple method where organic waste is buried directly in the ground to decompose naturally. This method is particularly useful for gardeners looking to enrich specific areas of their garden without the need for a compost bin or pile.
How to Set Up a Trench or Pit
- Select a Location: Choose an area in your garden where you want to improve the soil.
- Dig a Trench or Pit: Dig a trench about 12-18 inches deep and as long as needed, or dig a pit of similar depth.
- Add Organic Waste: Place kitchen scraps and garden waste into the trench or pit.
- Cover with Soil: Cover the waste with the soil you removed, ensuring it is well buried.
Materials and Layering Technique
- Materials: Kitchen scraps, garden waste, leaves, and other organic materials.
- Layering Technique: If desired, layer green and brown materials to balance nitrogen and carbon. However, simple burial without layering also works well.
Pros and Cons
Pros:
- Easy Setup: Requires minimal effort and no special equipment.
- Soil Enrichment: Directly enriches the soil where waste is buried.
- Low Maintenance: Once buried, no further attention is needed.
Cons:
- Slow Decomposition: Takes longer for materials to break down compared to other methods.
- Location-Specific: Only enriches the soil in the specific areas where waste is buried.
I’ve used trench composting to prepare new garden beds in my farm at Uttrakhand, and it has worked wonderfully. The organic waste decomposes slowly, gradually improving soil fertility. It’s a low-effort method that integrates seamlessly with my gardening routine. I particularly like trench composting for its simplicity and effectiveness in enriching specific garden areas.
Tumbler Composting
Tumbler composting uses a rotating drum to facilitate the composting process. This method is designed to make composting easier and faster by allowing you to turn the compost with minimal effort, ensuring even decomposition.
Setup and Operation of a Compost Tumbler
- Assemble the Tumbler: Set up the compost tumbler according to the manufacturer’s instructions. Ensure it is placed in a sunny location to maintain warmth.
- Add Materials: Add a mix of green and brown materials. The tumbler’s design usually makes it easy to load and unload materials.
- Rotate Regularly: Turn the tumbler every few days to mix the materials and introduce oxygen, which speeds up decomposition.
Benefits of Using a Tumbler for Composting
- Efficiency: Speeds up the composting process, producing compost in a few weeks to a couple of months.
- Ease of Use: The rotating mechanism makes it easy to mix materials without manual labor.
- Compact Design: Suitable for small gardens and urban settings.
Pros and Cons
Pros:
- Fast Composting: Accelerates the decomposition process.
- Convenient: Easy to use and requires less physical effort.
- Neat and Tidy: Contains composting materials, reducing mess and odors.
Cons:
- Cost: Initial investment can be higher than traditional compost bins.
- Limited Capacity: Tumbler bins often hold less material than large compost piles.
From my experience with tumbler composting, here are a few tips:
- Balance Materials: Maintain the right balance of green and brown materials for optimal decomposition.
- Monitor Moisture: Check the moisture level regularly. Add water if it’s too dry or more brown materials if it’s too wet.
- Avoid Overloading: Don’t overfill the tumbler; leave space for air to circulate and for the materials to mix effectively.
Leaf Mold Composting
Leaf mold composting is a specific method of composting where fallen leaves are left to decompose naturally, creating a rich, crumbly soil amendment known as leaf mold. This method focuses on using a single type of organic material: leaves.
Process: Collecting Leaves, Maintaining Moisture
- Collecting Leaves: Gather fallen leaves in the autumn. You can collect them from your garden or neighborhood.
- Piling or Bagging: Create a pile of leaves in a designated area or place them in large black garbage bags. Ensure the leaves are moist before sealing the bags or covering the pile.
- Maintaining Moisture: Keep the leaves moist by watering them occasionally if necessary. The decomposition process can take 6 months to 2 years, depending on the climate and conditions.
Benefits of Leaf Mold for Soil Health
- Soil Structure: Improves soil structure by enhancing its ability to retain moisture and nutrients.
- Beneficial Microorganisms: Encourages the growth of beneficial microorganisms, contributing to soil health.
- Mulching: Makes an excellent mulch that suppresses weeds and retains soil moisture.
Pros and Cons
Pros:
- Low Effort: Requires minimal maintenance once the leaves are collected.
- Natural Process: Utilizes a natural, slow decomposition process.
- Soil Benefits: Produces a valuable soil amendment that improves soil health.
Cons:
- Time-Consuming: Takes longer to decompose compared to other composting methods.
- Material Specific: Limited to leaves, not suitable for other types of organic waste.
I’ve been using leaf mold composting for years, particularly to improve the soil in my garden beds. The slow decomposition process requires patience, but the results are worth it. The leaf mold adds structure to my garden soil, retains moisture, and provides a habitat for beneficial soil organisms. It’s an effortless way to recycle autumn leaves and enhance garden health.
Hot Composting
Hot composting is a fast composting method that uses high temperatures to quickly break down organic materials into rich compost. This method is ideal for those who want compost ready in a few weeks rather than months.
Materials and Process for Hot Composting
- Materials: Green materials (vegetable scraps, grass clippings) and brown materials (dried leaves, straw).
- Process: Create a compost pile with a balance of green and brown materials, approximately three parts brown to one part green. Pile the materials in layers, aiming for a minimum size of 3x3x3 feet to retain heat.
Temperature Management and Turning
- Temperature: Hot composting requires the pile to reach 55-65°C (131-149°F). Use a compost thermometer to monitor the temperature.
- Turning: Regularly turn the pile every few days to introduce oxygen and redistribute heat. This helps maintain high temperatures and speeds up decomposition.
Pros and Cons
Pros:
- Fast: Produces compost in a few weeks.
- Kills Pathogens: High temperatures kill weeds and pathogens.
- Efficient: Rapid decomposition of organic materials.
Cons:
- Labor-Intensive: Requires frequent turning and monitoring.
- Space-Consuming: Needs a large enough pile to retain heat.
From my experience, achieving hot composting requires diligence:
- Pile Size: Ensure the pile is large enough to maintain heat.
- Moisture Level: Keep the pile as moist as a wrung-out sponge.
- Frequent Turning: Turn the pile every 2-3 days for best results.
Comparing various types of composting methods, you’ll find that hot composting requires more effort but yields faster results.
Cold Composting
Cold composting is a low-maintenance method where organic materials decompose naturally over time with minimal intervention. It’s ideal for those who prefer a hands-off approach.
Materials and Minimal Maintenance
- Materials: Any organic waste, including kitchen scraps and garden clippings.
- Minimal Maintenance: Simply add materials to the compost pile or bin as they become available. Turn the pile occasionally, but it’s not essential.
Timeline and Benefits
- Timeline: Cold composting takes longer, typically 6 months to 2 years.
- Benefits: Requires little effort, gradually improves soil health, and recycles organic waste.
Pros and Cons
Pros:
- Low Effort: Minimal maintenance required.
- Accessible: Easy for beginners.
- Space-Saving: Can be done in small garden spaces.
Cons:
- Slow: Takes much longer to produce compost.
- Pathogens and Seeds: May not kill weed seeds or pathogens due to lower temperatures.
One of the simplest types of composting methods is cold composting, which requires minimal maintenance over a longer period.
Cold composting is perfect for my busy schedule. I add waste as it accumulates, and nature does the rest. Although it takes longer, the low-maintenance aspect suits my lifestyle, and the compost produced is excellent for my garden.
Indoor Composting
Indoor composting allows you to compost kitchen waste within your home, making it accessible for those without outdoor space. Suitable methods include small compost bins, vermicomposting, and Bokashi.
Suitable Methods: Small Bins, Vermicomposting, Bokashi
- Small Bins: Compact compost bins designed for indoor use. They typically use charcoal filters to control odors.
- Vermicomposting: Uses worms in a small bin to break down organic waste into worm castings.
- Bokashi: An anaerobic method that ferments kitchen waste using Bokashi bran in a sealed container.
Managing Odors and Space
- Odors: Use bins with tight lids and charcoal filters. Bokashi bins are excellent for odor control.
- Space: Choose methods that fit your living space. Vermicomposting and Bokashi bins are compact and can be kept under the sink or in a closet.
Pros and Cons
Pros:
- Convenient: Compost indoors regardless of weather.
- Efficient: Methods like Bokashi and vermicomposting process waste quickly.
- Compact: Suitable for apartments and small homes.
Cons:
- Maintenance: Regular feeding and monitoring required for vermicomposting.
- Odors: Potential for odors if not managed properly.
- Initial Cost: Investment in specialized bins.
Indoor composting has been a game-changer for me. I started with a small vermicomposting bin under my kitchen sink and was delighted with the results. The worms efficiently processed my kitchen scraps, and the castings were perfect for my indoor plants. When I expanded to Bokashi, I appreciated the ability to compost a wider range of waste without odors.
Hugelkultur
Hugelkultur is a unique method of composting that involves creating raised garden beds filled with logs, branches, and organic waste. This method mimics natural forest processes and provides long-term soil fertility.
Materials Needed (Logs, Branches, Organic Waste)
- Logs and Branches: Forms the core of the Hugelkultur mound, providing a long-term carbon source.
- Organic Waste: Kitchen scraps, garden clippings, leaves, and other compostable materials.
- Soil: To cover the mound and plant into.
Building a Hugelkultur Mound
- Select a Site: Choose a location for your Hugelkultur bed.
- Layering: Start with large logs at the bottom, followed by branches, then smaller organic waste, and finally a layer of soil on top.
- Shape the Mound: Form the mound into a raised bed, ensuring it’s well-packed and stable.
Pros and Cons
Pros:
- Water Retention: Logs and branches retain moisture, reducing the need for watering.
- Long-Term Fertility: Provides nutrients over several years as the wood decomposes.
- Sustainable: Utilizes natural materials and mimics forest ecosystems.
Cons:
- Initial Effort: Requires significant effort to gather materials and build the mound.
- Space: Needs more space compared to other composting methods.
- Slow Start: Takes time for the logs to begin decomposing and providing nutrients.
Among the innovative types of composting methods, Hugelkultur stands out for its use of logs and organic waste to create raised garden beds.
I have never personally tried this method nor have I seen it with my own eyes. I think, that for us, organic composting or vermicomposting (if you have the space) else Bokashi composting is perhaps the most efficient and practical way to go.
Selecting the Right Method for Your Needs
When selecting the best method amongst the different types of composting methods, it’s crucial to consider your own specific circumstances:
- Space: How much room do you have? Indoor composting methods like vermicomposting and Bokashi are great for small spaces, while traditional and Hugelkultur composting require more room.
- Time: How quickly do you need compost? Hot composting produces compost in weeks, whereas cold composting and leaf mold composting take longer.
- Effort: How much maintenance are you willing to do? Vermicomposting and Bokashi require regular attention, while cold composting and trench composting are low-maintenance.
- Materials: What types of organic waste do you generate? Bokashi can handle all kitchen scraps, including meat and dairy, while vermicomposting is best for vegetable scraps and coffee grounds.
Comparing the different types of composting methods on These Factors
- Traditional Composting: Requires moderate space, time, and effort. Suitable for those with a garden and a mix of green and brown materials.
- Vermicomposting: Ideal for small spaces and quick composting. Needs regular maintenance and is great for vegetable scraps.
- Bokashi Composting: Perfect for all kitchen scraps and small spaces. Requires regular attention and an initial investment in bins and bran.
- Trench Composting: Low-effort and low-maintenance. Best for those with garden space and who don’t need compost quickly.
- Tumbler Composting: Fast and efficient. Good for those with moderate space and willing to invest in a tumbler.
- Leaf Mold Composting: Low maintenance but slow. Excellent for those with abundant leaves.
- Hot Composting: Quick results but labor-intensive. Suitable for those with time and space to manage the pile.
- Cold Composting: Easy and low-maintenance but slow. Ideal for those who don’t need compost urgently.
- Hugelkultur: Requires significant space and initial effort. Best for those looking for long-term soil enrichment.
Recommendations for Different Household Types
- Urban Apartments: Vermicomposting, Bokashi composting, indoor bins.
- Suburban Homes: Traditional composting, tumbler composting, trench composting.
- Rural Properties: Hugelkultur, hot composting, large-scale traditional composting.
From my experience, the best composting method is the one that fits seamlessly into your lifestyle. Start small and experiment with different techniques. For instance, I began with vermicomposting in my kitchen, which was manageable and rewarding. Over time, I added Bokashi composting for a wider range of waste and eventually tried trench composting in my garden. Each method has its unique benefits, and combining them can optimize your composting efforts.
Conclusion
Composting methods vary widely, from traditional and vermicomposting to Bokashi, trench, and hot composting. Each method offers unique advantages depending on your space, time, effort, and materials available.
By familiarizing yourself with the different types of composting methods, you can effectively turn kitchen scraps into nutrient-rich soil for your garden.
No matter your living situation, there’s a composting method that can work for you. Composting is a simple yet impactful way to reduce waste, enrich your soil, and contribute to a more sustainable environment.
I recall the first time I used my homemade compost in my garden – the plants thrived like never before. The satisfaction of turning kitchen scraps into “black gold” for my garden was immense. Composting has not only reduced my household waste but also transformed my gardening experience. I encourage you to start composting and enjoy the numerous benefits it brings to your home and the planet.
FAQ Section
1. What is the easiest composting method for beginners?
For beginners, vermicomposting and cold composting are the easiest methods. Vermicomposting requires minimal space and can be done indoors, while cold composting is low-maintenance and can be done with minimal effort, although it takes longer to produce compost.
2. Can I compost meat and dairy products?
Yes, you can compost meat and dairy products using the Bokashi composting method. Bokashi composting is an anaerobic process that ferments all types of kitchen scraps, including meat, dairy, and oily foods, without producing unpleasant odors.
3. How do I know when my compost is ready to use?
Compost is ready to use when it is dark, crumbly, and has an earthy smell. The original materials should be mostly decomposed, and the compost should feel like rich soil. If it still has a strong odor or recognizable pieces of organic waste, it needs more time to decompose.
